One of the easiest and most cost effective DIY home improvement projects is upgrading the paint, and replacing the outlet and switch plate covers throughout your home. Your home will instantly increase in appeal and value.
A newly painted room not only looks clean, it is clean! Preparing a room for a fresh coat of paint includes pulling away all furniture from the walls, and cleaning the baseboards. This project can double as an opportunity to knock out some overdue spring cleaning.
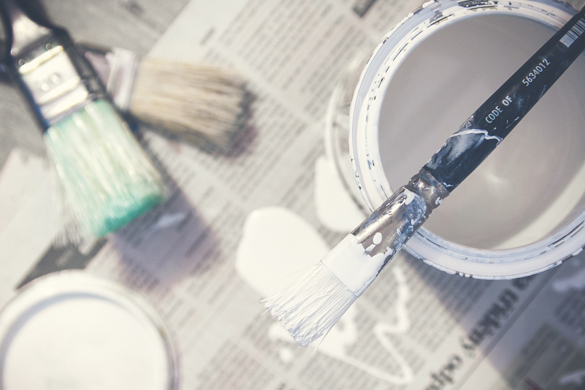
Once you’ve chosen the color scheme (neutral colors are most suitable when reselling your home), take inventory of the supplies that you may already have. Next, head over to your local home improvement or hardware store to get the paint, tape, brushes, drop cloths, caulking, spackle, sandpaper, and other wall repair supplies that you may need.
Preparing to Paint
You don’t have to be a professional painter to get professional looking results. The following steps will assist you in preparing a room for a fresh coat of paint.
- Pull all furniture towards the center of the room (or remove it if necessary), leaving a 4 foot wide unobstructed path around its perimeter. This will provide ample room to easily maneuver and avoid unintentionally painting another surface.
- Remove all outlet and switch plate covers. Don’t waste your time trying to tape around them.
- Remove hanging shelves, pictures, and portraits from the walls.
- Visually scan the walls for any nails, cracks, or holes that need to be pulled or filled. Fill holes and cracks with a quick drying spackle. Once dry, sand smooth or to texture.
- Using a broom or vacuum cleaner, be sure to eliminate any cobwebs or debris from the walls and corners (this debris can easily pollute your pain or brush).
- Using painter’s tape or masking tape; tape around window frames, along baseboards, and along the ceiling (or crown molding) where it meets the wall. This may require multiple rolls depending on the size of the room(s) to be painted.
- Lay out a drop cloth, paper, or plastic floor protection. Accidents happen, so it’s best to be prepared!
- Open the paint, be sure it has been well mixed or stirred, pour some into the trough for the roller(s), and some into a small container for the brushes.
- Set up a sturdy 2 or 3 step ladder for the “overhead” work.
NOTE: Prolonged exposure to concentrated paint fumes can cause headaches and nausea. Make sure that doors and windows are left open for ventilation and two to allow fresh air into the room.
Painting the Corners, Baseboards, Trim, and Crown Molding
Painting thin strips of wood requires careful attention to detail and patience. Your arms and hands will be in unfamiliar positions for extended amounts of time, so throughout the process, take frequent micro-breaks to stretch and relax. Doing this will keep your hand steady, which is necessary in applying a professional looking coat of paint.
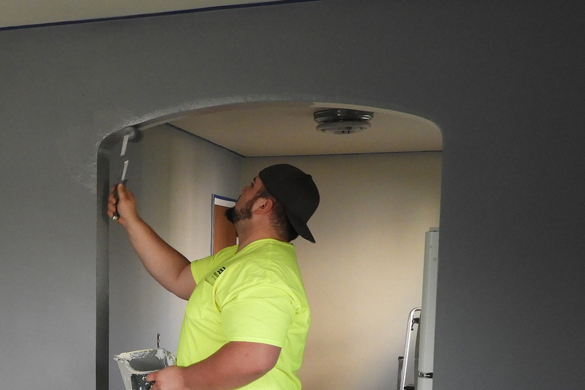
Now that you are ready, start from the ceiling and work your way down.
- Choose a corner to start in and using a 1-1/2 inch brush or corner roller, paint the corner from the ceiling to the baseboard, extending at least 1 inch to the left and right of the corner. Repeat this process for each of the corners in the room(s).
- Using the 1-1/2 inch brush, paint a 2 inch strip along the ceiling or crown molding from one corner to the next. Repeat until all of the trim work around the ceiling is done.
- Repeat step #2 for the baseboards.
- Again, using the 1-1/2 inch brush, paint a 2 inch strip around any window frames and window sills.
- When you’ve finished, go back to the beginning and inspect your work for any gaps or missed areas. Touch up where necessary.
Painting Hack for Popcorn Ceiling – If you have popcorn ceilings and cannot apply masking tape, use a long piece of cardboard (12 to 15 inches with a straight edge). Simply line up the cardboard to the edge you are going to paint and brush it on using the cardboard as the guide. As it soaks up the paint, you will need several pieces to complete the job.
Rolling the Walls
Now that all of the trim work is done, it’s time to roll the walls. It is important to take your time and give maximum attention to detail. The faster you go, the messier, less professional, and appealing the job will be.
You will also want to keep a couple of damp cloths nearby to clean up any spilled paint or paint that finds its way to an area that wasn’t supposed to be painted.
- Fill the roller by rolling it into the trough several times – allowing it to soak up as much paint as it can.
- Choose a wall and start in one of the corners, rolling from the ceiling to the baseboard (slowly and evenly). Rolling too fast will cause the paint to “spray”, creating a not-so-fun mess to clean up. Too much pressure will cause the paint to drip from the roller. Find the “sweet spot” and roll on!
- Refill the roller periodically as needed, and continue rolling until you reach the next corner.
- Before moving to the next wall, inspect your work, touching up any roller marks or missed areas.
- Repeat the above steps until the entire room is painted.
- Once any touch up work has been done and the paint has had ample time to dry, remove the painter’s tape from the ceiling, baseboards, and trim.
Important Tips About Painting Rollers – Depending on the quality of the roller, it will get matted as you progress through the project. Have an extra roller (or two) ready to go when needed. Rooms with high ceilings can pose a challenge, but nearly all rollers can be screwed onto a standard threaded broomstick or extension pole.
Take a look at this video for some great rolling tips.
Replacing Outlet and Switch Plate Covers
Since you’ve gone through the process of updating the room, it makes sense to do the same with the outlet and switch plate covers. Overtime these plastic covers undergo normal wear and tear, and are easier to simply replace.
Unless you are going for the super ornate or USB adapted covers (these may require some re-wiring), they are relatively inexpensive and come in a variety of colors and styles.
DIY Quality and Attention to Detail Pay Off
Attention to detail is very important when painting. Uneven coats of paint, splotches, and reckless edges all stand out “like a sore thumb”. The quality of your painting job, like any other DIY project, will directly reflect your patients, attention to detail, and commitment to creating a better home and resale value.
Stand back and admire your work. Not only have you refreshed your walls and living environment, you have added value to your home.
Visit homeandgardeningguide.com/improvement/painting/ for more painting articles, resources and how-to tips.
The post DIY Interior Painting – Trim, Baseboard, and Crown Molding appeared first on http://www.homeandgardeningguide.com
No comments:
Post a Comment